You know the feeling intimately. The clock strikes one, the morning rain has finally stopped battering the office window, and you reach into your bag for the lunch you carefully prepared hours ago. You peel back the foil or unclip the plastic box, anticipating the sharp bite of mature cheddar and the sweet tang of pickle.
Instead, your fingers meet a damp, collapsing mess. The structural integrity has vanished, leaving you holding something that more closely resembles a wet sponge than a satisfying meal. It is a quiet, midday tragedy that millions accept as the inevitable cost of a packed lunch.
We have been conditioned to believe that standard, pre-sliced white bread is the default canvas for our midday meals. It is soft, compliant, and familiar. Yet, when tasked with holding wet tomatoes, dressed leaves, or a generous layer of mayonnaise over a five-hour stretch, that same soft crumb acts as a thirsty wick.
The professional delis and corner cafes do not possess magical ingredients, but they do understand the physics of food construction. They know that a sandwich is essentially an exercise in moisture management, and standard white bread, straight from the plastic wrapper, is poorly equipped for the job.
The Waterproofing Paradox
The natural reaction to a soggy sandwich is to start withholding the good things. You dab the tomatoes with kitchen roll, you skimp on the mustard, and you pack the lettuce in a separate little tub like a science experiment. You treat the filling as the enemy.
But the filling is not the flaw; the foundation is. Think of your sandwich as a small terrarium. If the walls are porous, the condensation will ruin the structure. The secret lies not in drying out your ingredients, but in weatherproofing your bread.
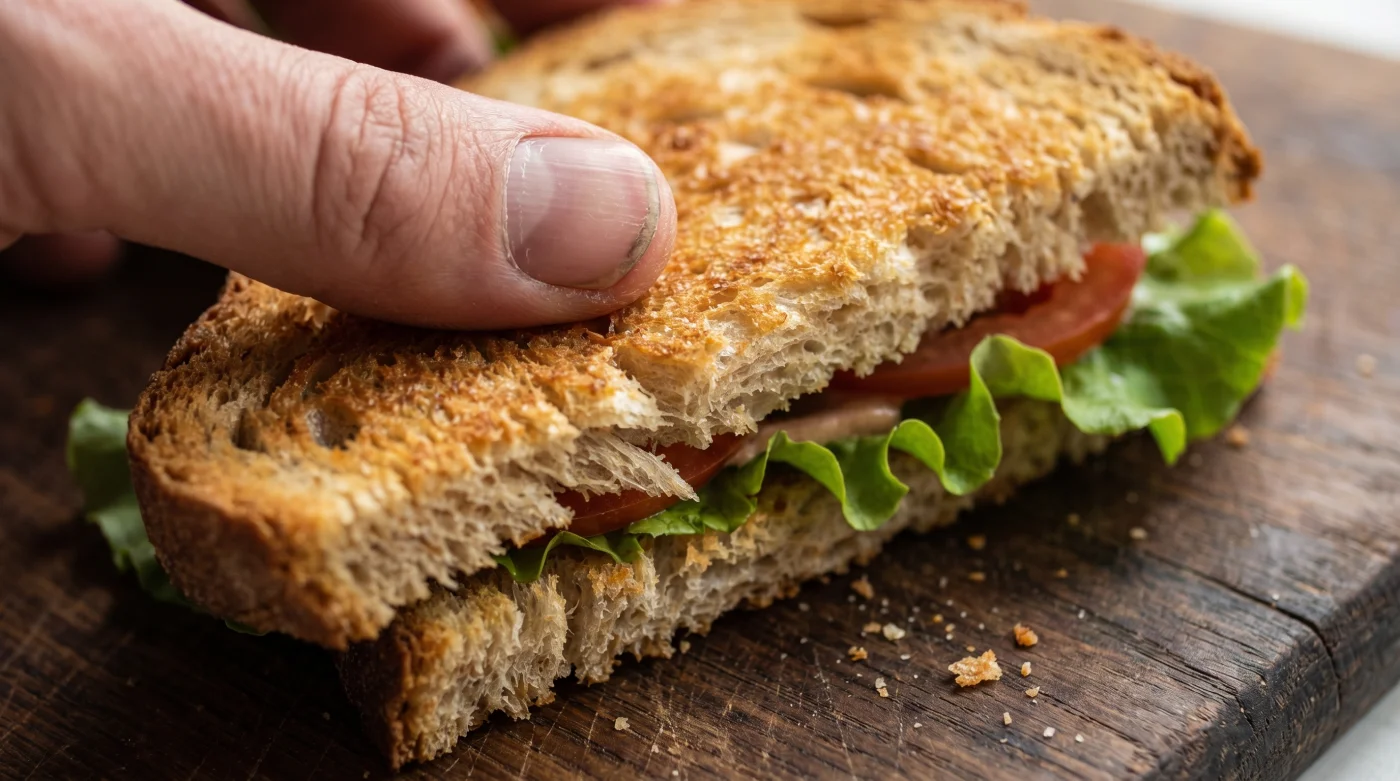
This brings us to a wonderfully simple pivot: abandoning the thin, standard white slice for a thicker cut, and applying a highly specific burst of heat. By toasting only the inside face of a thick slice of bread, you create an impenetrable crust against the wet ingredients, while the outside remains perfectly soft and yielding against the roof of your mouth.
Martin Hayes, a 42-year-old independent sandwich shop owner in Leeds, builds over three hundred sandwiches before the lunchtime rush hits at noon. His ‘Roast Beef and Horseradish’ sits in the chiller for hours without losing an ounce of dignity. “People think we use special commercial bread,” Martin notes as he slides a tray of thick-cut sourdough under the salamander grill. “We don’t. We just grill the inside face until it feels like coarse sandpaper, then we spread the butter on that hot, sealed surface. It acts like a raincoat. The outside stays soft so it doesn’t tear up your gums, but the inside holds back a flood of gravy.”
Adapting to the Filling
Not all moisture is created equal. The way you prepare your thick-cut bread should directly respond to what you intend to place inside it.
The Ploughman’s Purist
When dealing with Branston pickle, thick-cut ham, and sharp cheddar, the threat is acidic moisture. For this, your inner toasted barrier needs a fat seal. Butter the toasted side while it is still hot, allowing the dairy to melt into the micro-crevices, creating a watertight layer before the pickle ever touches the crumb.
The Salad Stack
Tomatoes and cucumbers release water continuously. They weep into the bread long after the sandwich is built. Here, the single-sided toast needs to be slightly darker, taking on a deep golden hue under the grill. Skip the warm butter and instead use a thin layer of full-fat mayonnaise on the cooled toasted side; oil repels water instantly.
The Next-Day Commuter
If you are making lunch at nine o’clock at night for the following day, the moisture has twelve hours to migrate. You must use a true thick-cut farmhouse loaf. Toast the inside under a fierce grill, let it cool entirely on a wire rack so steam doesn’t soften the crust, and use a barrier of dry cheese against the toast before adding any wet ingredients.
The Single-Side Strategy
Executing this requires nothing more than a standard kitchen grill and a touch of patience. Dropping thick slices into a standard pop-up toaster will ruin the effect, as both sides will harden, leaving you with an aggressive, roof-scraping eating experience.
You want the tension of textures: a soft, forgiving exterior yielding to a crisp, resilient core.
- The Cut: Slice your loaf at least an inch thick. Pre-sliced ‘thick’ white bread rarely has the density required; opt for an uncut crusty white or a mild sourdough.
- The Heat: Preheat your oven grill to a medium-high setting. Do not rush this with a maximum flame, or you will burn the edges before the centre dries out.
- The Placement: Lay the slices flat on a baking tray. Grill for precisely two to three minutes, watching closely. You want an even, golden colour on the exposed top face only.
- The Cooling: This is critical. Remove the slices and immediately prop them up against each other in a ‘tent’ shape. Laying them flat traps steam, reversing all your hard work.
- The Assembly: Once entirely cool, apply your fats (butter, mayo, or cream cheese) directly to the rough, toasted side. Build your wettest ingredients in the very centre, safely sandwiched between these armoured walls.
A Quiet Midday Dignity
Changing how you construct your lunch might seem like a trivial detail in the grand sweep of a busy work week. Yet, it is precisely these small, manageable adjustments that dictate the rhythm of our days.
There is a profound, quiet pleasure in opening a lunchbox at your desk or on a park bench and finding your food exactly as you intended it. It is a small act of self-care prepared hours in advance.
By discarding the flimsy, standard white slice and mastering the inside-toast method, you stop settling for the disappointment of a soggy, compromised meal. You turn a simple packed lunch into a reliable moment of comfort, proving that a little mindful preparation can entirely transform the middle of your day.
“A sandwich is only as good as its foundation; protect the crumb, and the ingredients will sing.”
| Key Strategy | The Mechanism | Added Value for You |
|---|---|---|
| Thick-Cut Loaf | Provides a deeper physical barrier for moisture to travel through. | Stops the sandwich from tearing or falling apart in your hands. |
| Single-Side Toasting | Creates a hard crust on the inside while keeping the outside soft. | Protects your gums while maintaining a watertight interior seal. |
| Fat Sealing | Using butter or mayonnaise on the toasted side repels water. | Allows you to pack wet ingredients like tomatoes without fear. |
Frequently Asked Questions
Can I use a frying pan instead of a grill?
Yes, a dry cast-iron pan works beautifully. Just press the slice down gently on one side until golden, then remove it immediately.Does this work with brown or seeded bread?
Absolutely. Seeded bread actually toasts incredibly well, with the seeds adding an extra layer of crunch to the moisture barrier.Should I salt my tomatoes before packing them?
If you have time, yes. Salting them on a piece of kitchen roll for ten minutes draws out excess water before they even touch the bread.Why do I need to let the toast cool?
If you build the sandwich while the toast is hot, the residual steam gets trapped by the cold ingredients, creating condensation that ruins the crust.What if I prefer a hot sandwich?
If you plan to heat it later, use the same technique but wrap it tightly in foil. The foil helps regulate the heat when you eventually pop it in the office toastie maker.