January mornings in a British kitchen hold a specific, biting chill. The slate floor radiates cold through your slippers, and the granite worktops feel like blocks of solid ice. You mix your flour, water, and salt, kneading the mass until it turns smooth and elastic. You set it aside to prove, expecting the usual magic, but as the hours tick by, the dough simply shivers in its bowl, dense and stubbornly refusing to budge.
You stare at the bowl, watching the clock tick past the two-hour mark like a kettle you desperately need to boil. Winter baking often feels like an agonising standoff with sluggish yeast. The standard advice is to place the bowl near a blistering radiator or sit it atop a pre-heating oven. This almost always ends in disaster. You are left with a dried-out, crusty skin forming over your loaf, or disastrously, a partially cooked base that kills the yeast outright before it ever reaches the tin.
Instead of forcing aggressive, direct heat upon your bake, you must understand how yeast actually wants to wake up. We tend to view bread-making as a rigid set of instructions, but it is deeply environmental. The flaw in most domestic kitchens is the wildly fluctuating air temperature, but a major advantage sits quietly in the corner of your worktop, entirely ignored.
The Perspective Shift: Warming the Bed, Not the Room
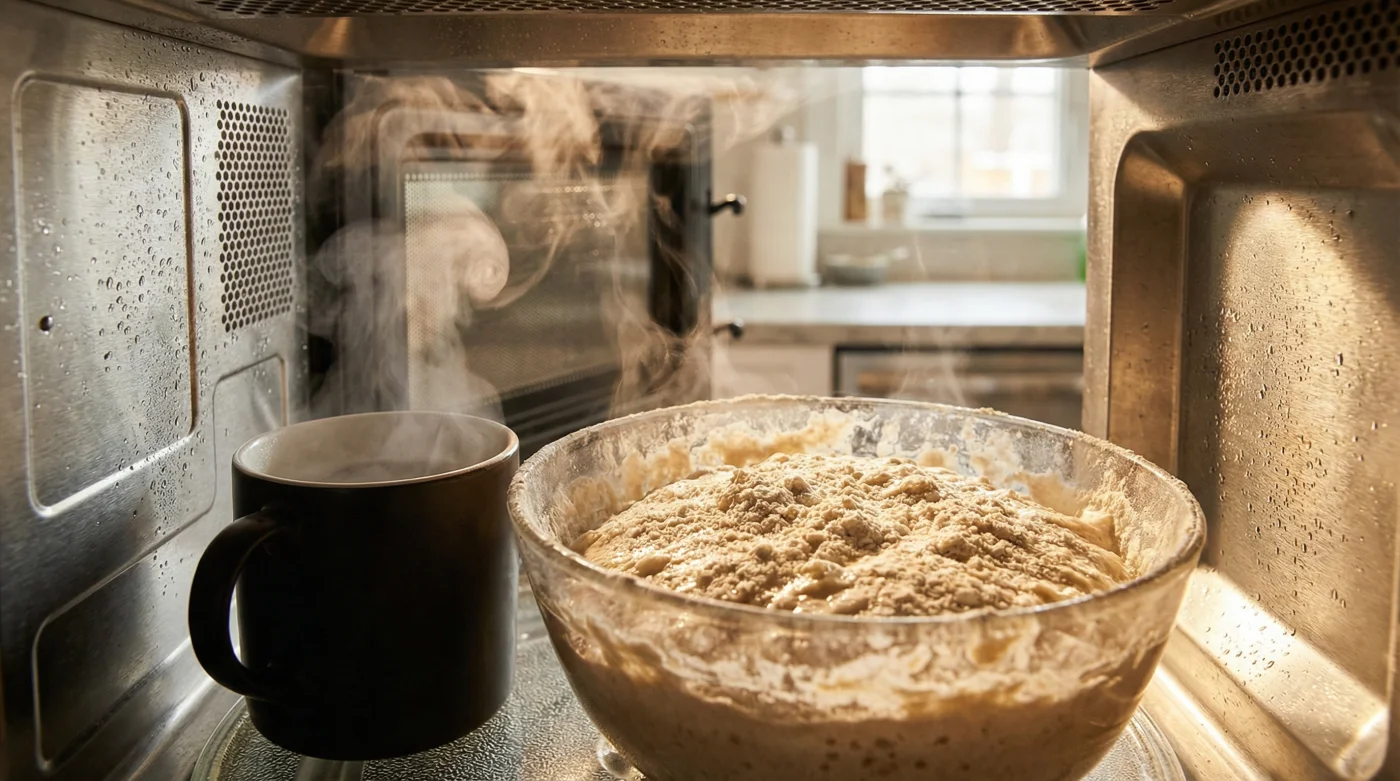
Dough is a living thing, a breathing organism that resents being rushed or shocked. Think of your resting loaf not as a chemical equation, but as a hibernating creature. You do not rouse it by throwing boiling water over its face; you gently warm its bed. When you rely on central heating, the air is dry and chaotic. But your standard kitchen microwave is, essentially, a perfectly insulated proving drawer waiting to be utilised.
A microwave seals entirely, blocking out the draughts from rattling sash windows and creating a completely neutral, enclosed space. By introducing a gentle, ambient heat source into this small box, you stop fighting the winter chill of your wider kitchen and start controlling a manageable micro-climate.
Take Sarah, a 48-year-old artisan baker operating out of a famously draughty Victorian terrace in North Yorkshire. Her stone kitchen rarely rises above 12°C between November and March. Before she invested thousands of pounds in commercial proving cabinets, she relied exclusively on this trick. She would microwave a pint glass of water for three minutes until it boiled, push the glass to the back of the appliance, and slide her covered bowl of dough right in beside it.
- The Surprising Historical Origins Behind Britain’s Most Iconic Afternoon Tea Cake
- Time-Saving Daily Routine Hacks For Faster Bread Proving During Cold Winter Months
- The Essential Beginner Guide To Mastering Flawless Shortcrust Pastry Every Time
- Stale sourdough bread returns to bakery softness using this rapid ice trick.
- Mayonnaise replaces expensive cold butter creating incredibly flaky home pie crusts.
Tailoring the Climate to Your Bake
Not all dough behaves the same way, and your micro-climate should be adjusted depending on what you have in the bowl. Here is how to segment your approach for different weekend projects.
For the Sourdough Purist
Manage the wild yeast with immense care. Sourdough cultures are notoriously fickle and prefer a slow, gentle coaxing rather than a tropical shock. Instead of boiling the water, heat your mug until it is steaming but not vigorously bubbling (around 60°C). Slide your banneton or bowl into the microwave. This takes the harsh edge off the winter chill, allowing the complex acidic flavours to develop over four hours rather than letting them stall for twelve.
For the Rushed Weekday Baker
When you are using commercial fast-action dried yeast for a standard sandwich loaf, the yeast wants to sprint. You can afford to be more aggressive. Boil the water rapidly for a full three minutes. Create a thick, steamy environment inside the microwave, then add your covered bowl. You will often see a full double in size in under forty-five minutes, effortlessly slicing your waiting time in half so you can actually eat before nine o’clock at night.
For the Enriched Dough Enthusiast
Butter changes the rules entirely. If you are proving cinnamon buns, brioche, or anything heavily enriched with dairy, a fiercely hot environment will melt the butter out of the dough, leaving you with a greasy puddle and a dry crumb. Heat a small ramekin of water until barely warm to the touch. You want just enough humidity to keep the sugar and eggs relaxed, maintaining an ambient temperature of around 24°C inside the chamber.
The Mindful Application: Creating Your Micro-Bakery
This routine is about reclaiming your time through mindful, minimalist actions. To execute the ambient heat trick flawlessly, follow these specific steps without overcomplicating the setup.
Do not skip the cover. Even in a humid environment, draping a damp tea towel over your bowl prevents the surface of the dough from drying out, which would otherwise restrict your final oven spring.
- Fill a heavy ceramic mug or a heat-proof glass jar with tap water.
- Microwave it on high until bubbling (typically two to three minutes).
- Leave the mug pushed to the back corner of the microwave.
- Immediately slide your covered dough bowl onto the glass turntable next to it.
- Shut the door quickly to trap the steam. Never turn the appliance on while the dough rests inside.
- If proving takes longer than an hour, briefly remove the dough, re-heat the water, and replace the bowl to refresh the micro-climate.
The Bigger Picture: Reclaiming Your Winter Weekends
Baking shouldn’t be a hostage situation. When you master this simple habit, you stop being a victim of the British winter weather. You no longer have to cancel afternoon plans because a stubborn loaf refuses to rise, nor do you have to compromise on the quality of your crumb by resorting to the drying heat of a radiator.
Understanding your environment gives you a profound sense of control in the kitchen. It turns a frustrating, unpredictable chore into a reliable, satisfying rhythm. You are no longer just blindly following a recipe; you are actively managing the conditions, ensuring that every loaf, bun, or roll you create is given the exact warmth and respect it needs to thrive, regardless of the frost on the windows outside.
"Great bread isn’t about rushing the clock; it is about providing the perfect, quiet environment for the dough to do its best work while you get on with your day."
| Key Point | Detail | Added Value for the Reader |
|---|---|---|
| The Heat Source | A single mug of boiling water inside an inactive microwave. | Eliminates the cost and space requirements of a dedicated proving drawer. |
| The Humidity Factor | Trapped steam prevents dough skinning. | Ensures maximum expansion and a lighter, airier final crumb structure. |
| The Time Saving | Cuts standard winter proving times by up to 50%. | Allows for fresh bread on busy weekdays without staying up past midnight. |
Will the microwave taste or smell affect my bread? Not at all, provided your microwave is clean. The damp tea towel over your bowl acts as a protective barrier against any lingering food odours. Can I use a plastic bowl for this method? Yes, plastic, glass, or ceramic bowls all work perfectly, though glass retains the ambient warmth slightly better than thin plastic. What if my dough still isn’t rising? Check your water temperature. If the water cooled too quickly, simply remove the dough, reheat the mug for two minutes, and place the dough back inside to refresh the heat. Does this work for the second prove in the baking tin? Absolutely. Once shaped and placed in the tin, pop it straight back into the humid microwave for its final rise before baking. Can I use this trick in the summer? It is usually unnecessary during warmer months, as the ambient room temperature is sufficient, but it remains a fantastic hack for overly air-conditioned kitchens.