You know the exact sound. The heavy, hollow thud of a plastic tub hitting the worktop, followed by the metallic scraping of a spoon against what feels like granite. You were hoping for a quick batch of flapjacks on a drizzly Sunday afternoon, but instead, you are facing the familiar kitchen stalemate.
The butter is resting, perfectly soft. The oats are weighed. Yet, your dark muscovado is petrified, holding onto its shape with the stubbornness of a fossil. It is an infuriating moment that turns a spontaneous pleasure into an unexpected arm workout with a rolling pin or a frantic blast in the microwave.
We accept this as normal. We chisel away at the molasses block, chipping off just enough dust to meet the recipe’s demands. But a quiet, almost forgotten method exists in older kitchens, replacing brute force with gentle chemistry.
Instead of fighting the sugar, you simply feed it. By introducing a completely mundane, everyday object into the container, the sugar transforms back into damp, yielding sand overnight.
The Moisture Economy of Molasses
Brown sugar is not really a solid; it is an emulsion in slow decay. The dark, sticky grains owe their texture to a delicate coating of molasses over standard white sucrose. Over time, the ambient air in your cupboard steals that moisture. Once the water evaporates, the molasses cements the crystals together into a solid brick.
Most of us try to seal the tub tighter, but sealing traps the dryness. What the tub actually needs is an active donor. Think of the environment inside your sugar caddy as a miniature weather system. If the air is bone-dry, the sugar suffers.
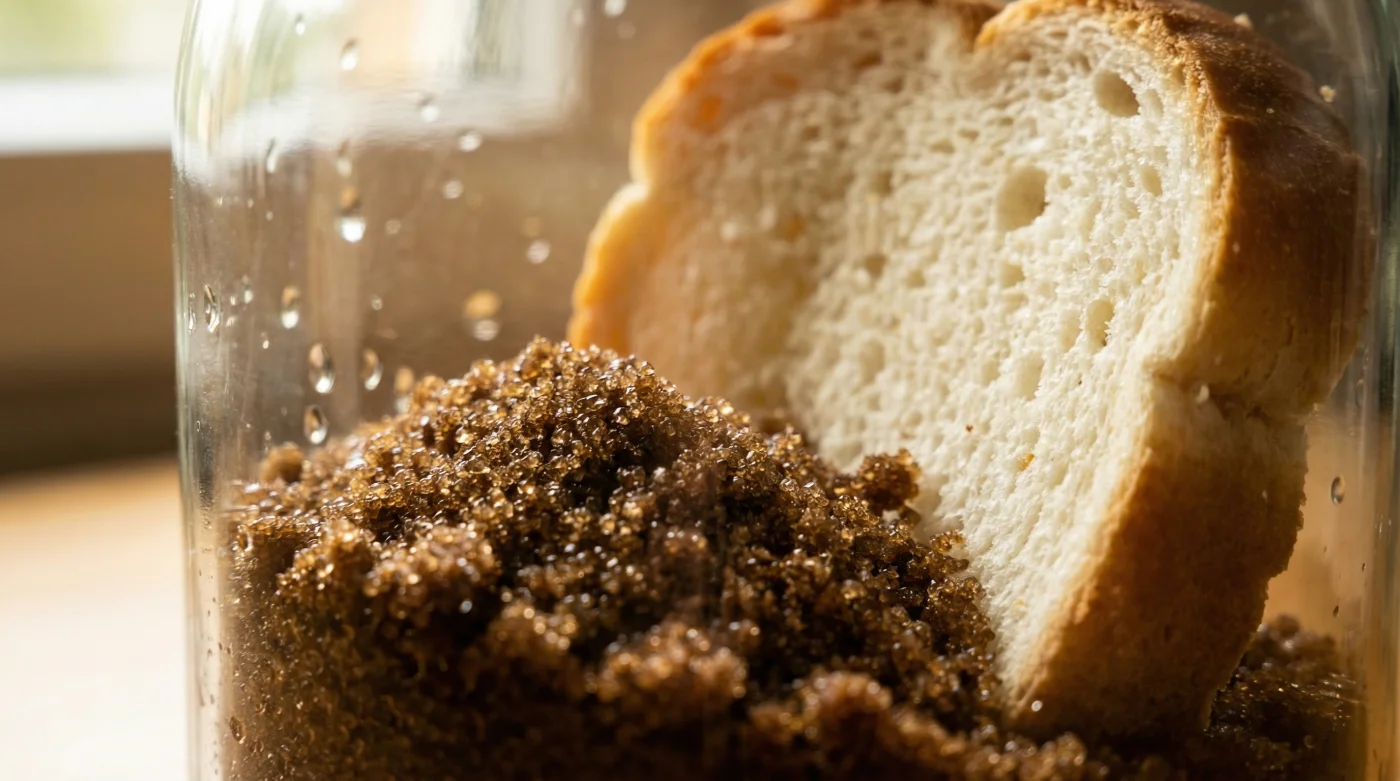
This is where a single slice of standard, soft white bread enters the equation. It acts as a sacrificial moisture battery. White bread acts as a sponge holding onto a surprisingly high percentage of water. When sealed in an airtight environment with the dehydrated brown sugar, the bread slowly exhales its moisture. The sugar crystals, desperate for hydration, drink it in. Within twenty-four hours, the rock crumbles, returning to its original trembling softness, while the bread turns to a crisp rusk.
Arthur Pendelton, a 68-year-old pastry chef who ran a beloved tearoom in Bath for three decades, never bothered with modern terracotta sugar savers. He kept his massive twenty-kilogram bins of dark brown sugar perpetually soft using just the ends of his sandwich loaves. “It is all about creating a closed moisture loop,” he once explained while effortlessly scooping perfectly fluffy sugar into a mixing bowl. “The bread sacrifices itself so the sugar can breathe. Change it every few months, and you will never see a lump.”
Tailoring the Crumb to Your Kitchen
Not every baking habit demands the exact same approach. How you deploy this tactile modification depends entirely on how often you reach for the mixing bowl and the volume of your supplies.
If your brown sugar sits undisturbed for months between batches of ginger nuts, a single slice of standard white sandwich bread is perfect. Place it directly on top of the sugar in an airtight container. The bread will dry out completely over a week, but the transfer keeps it pliable for months.
- Wooden cutting boards repel strong garlic odors absorbing simple lemon juice.
- Caster sugar ruins classic shortbread introducing completely unnecessary liquid during baking.
- Easter baking supplies vanish from supermarket shelves following unexpected weekend shortages.
- Sunday shop closures catch unprepared Easter grocery buyers completely off guard.
- Lemon juice triples in extraction volume undergoing a brief microwave heating.
If bread is not an option due to dietary restrictions, you can achieve the exact same transfer using half an apple core or a couple of large marshmallows. Marshmallows offer the added benefit of not introducing any fruit flavours to your baking supplies, though they take slightly longer to release their internal moisture than a porous slice of bread.
Assembling Your Sugar Saver
Implementing this is a quiet, deliberate act of kitchen maintenance. It takes less than a minute but saves you half an hour of frantic chipping during your next baking session.
Start by finding a genuinely airtight container with a silicone seal. The trick relies entirely on trapping the shared atmosphere. If the lid breathes, the bread will dry out into the room, leaving the sugar as hard as before.
- Break off any large, sharp shards of sugar to create a relatively flat surface.
- Take one slice of fresh, highly processed white bread (the softer, the better).
- Place a small square of greaseproof paper over the sugar.
- Rest the bread onto the paper to prevent direct crumbs mixing into your sugar.
- Seal the lid firmly and leave it in a cool, dark cupboard.
For your Tactical Toolkit: Use a standard supermarket white loaf due to its high water content. Expect a wait time of 12 to 24 hours for a full recovery of hardened sugar. You only need to initiate a replacement cycle when the sugar begins to stiffen again, which usually takes around three to six months. Store everything in a glass jar with a rubber gasket or a heavy-duty plastic tub with snap-locks.
Reclaiming the Spontaneous Bake
There is a profound comfort in knowing your ingredients are ready when you are. Kitchens are places of intuition and warmth, not battlegrounds where we fight our own supplies. By understanding the simple mechanics of how moisture moves, you remove a constant, low-level friction from your cooking routine.
It shifts the way you view a hardened block of ingredients. It is not ruined; it is simply thirsty. Rescuing it with a leftover crust of bread feels less like a desperate trick and more like a gentle coaxing, bringing a vital ingredient back to life. Next time the urge for a warm pudding strikes, your kitchen will be waiting to support you, yielding perfectly soft, fragrant sugar at the dip of a spoon.
“A well-maintained pantry does not require expensive gadgets; it simply requires an understanding of what your ingredients need to breathe.”
| Key Point | Detail | Added Value for the Reader |
|---|---|---|
| The Moisture Battery | White bread holds a high percentage of trapped water. | Revives rock-hard sugar without requiring microwaves or brute force. |
| Airtight Environment | The trick fails if the container allows air to escape. | Guarantees the bread hydrates the sugar rather than the cupboard. |
| Gluten-Free Alternatives | Marshmallows or apple halves mimic the porous bread effect. | Ensures allergy-friendly households can still maintain soft sugar. |
Frequently Asked Questions
Will the bread make my sugar go mouldy?
Not if the sugar is genuinely dry. The sugar crystals absorb the moisture so rapidly that the bread turns into a dry rusk long before mould can form.Do I need to use white bread?
White, highly processed bread works best because of its dense, sponge-like crumb and high moisture content, but a slice of brown will work in a pinch.How long does the slice need to stay in the tub?
You can leave it indefinitely. Once the bread is entirely dry, it simply rests on top until the sugar eventually hardens again months later.Should I mix the bread crumbs into the sugar?
No. Always place a small square of greaseproof paper between the bread and the sugar to keep your baking supplies completely crumb-free.Can I use this method for other hardened ingredients?
This specific transfer works brilliantly for dark and light muscovado, as well as heavily molasses-based baking sugars, but is not necessary for standard white caster sugar.