The kitchen is quiet, save for the faint hum of the preheating oven and the rhythmic ticking of the wall clock. You peel back the proving cloth, revealing a dome of sourdough that smells faintly of sharp green apples and damp earth. You have spent the better part of two days tending to this dough. You fed the starter until it bubbled like thick batter, managed the temperature of your workspace, and patiently executed every stretch and fold. The flour dusting your worktop feels like a quiet badge of honour.
Yet, a familiar anxiety lingers as you score the dough with your razor blade. You expect a dramatic bloom, a fierce, upward expansion that tears the crust into a jagged, beautifully caramelised ear. Instead, hour after hour, you pull out loaves that are stubbornly pale and surprisingly dense, feeling more like heavy paperweights than the airy artisan bread you envisioned.
The conventional wisdom tells you to crank the oven to its absolute limit, blasting the dough with raw, blistering, dry heat. But commercial bakeries operate on a completely different rhythm, one built around managing moisture, not just stoking fire. The secret to that weightless, cavernous crumb doesn’t lie in a hotter heating element. It rests in a modest aluminium roasting tin, pushed quietly into the bottom rack of your domestic oven.
The Steam Engine Principle
We are taught to treat baking like a furnace, stripping away moisture to build a tough crust. But when you view bread making purely as a set of mechanical instructions, a flat loaf feels like a personal failure. In reality, sourdough is a living, expanding entity, breathing through its starchy skin. If you hit it immediately with dry heat, the exterior fuses into a rigid shell before the yeast has finished its final, explosive exhalation.
Think of the dough like a hot air balloon. If the fabric turns to brittle glass the very moment the burner fires, the balloon shatters instead of lifting into the sky. Continuous steam delays crust formation, keeping the dough’s skin supple, sticky, and infinitely stretchable during those critical early minutes.
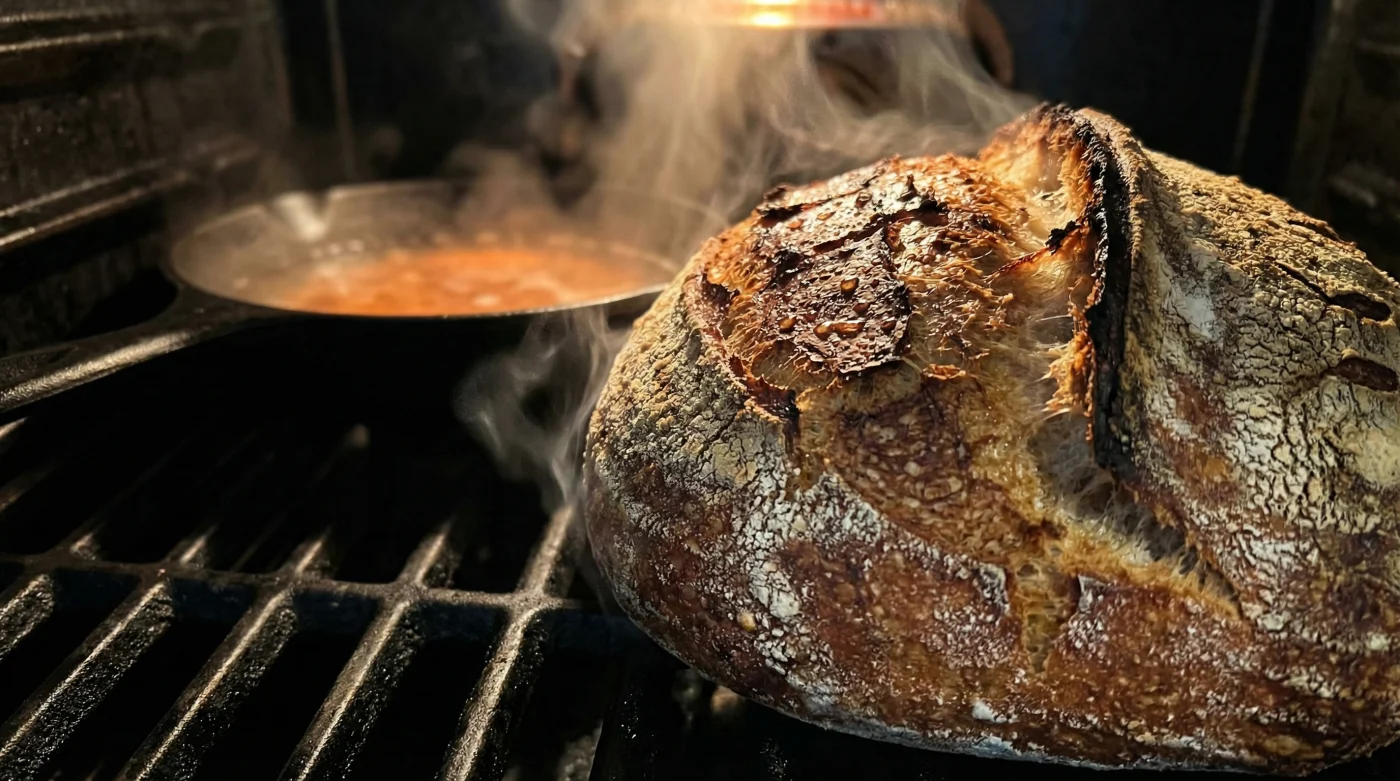
By introducing a hidden tray of boiling water the moment the bread goes in, you are entirely rewriting the oven’s atmosphere. The evaporating water wraps the loaf in a thick, protective fog, turning a harsh, dry box into a highly humid microclimate. The dough expands massively, riding the heat for a full twenty minutes before the crust is finally allowed to set, dry out, and take on that rich mahogany colour.
Consider the morning routine of Arthur Pendelton, a 58-year-old baker from a small village outside Bath. For decades, Arthur struggled to replicate the majestic oven spring of commercial deck ovens in his tiny cottage kitchen. His breakthrough wasn’t an expensive piece of equipment; it was a handful of lava rocks sitting in an old cast-iron skillet at the base of his oven. Pouring boiling water over those scorching stones generated a violent hiss and a thick plume of steam. Arthur realised that managing this artificial humidity was the only way to coax out the aggressive, airy rise that defines true sourdough, fundamentally changing his relationship with the craft.
Adapting Your Baking Environment
For the Cast-Iron Purist
You might be using a heavy Dutch oven, assuming the trapped moisture from the dough itself is enough. It is often a brilliant method, but sometimes the seal isn’t tight enough, or the dough simply lacks the internal hydration to generate enough vapour. Dropping a single ice cube underneath the baking parchment just before you secure the lid creates an instant, concentrated burst of moisture exactly where the dough needs it most.
For the Baking Stone Devotee
If you bake directly on a preheated pizza stone or baking steel, your dough is completely exposed to the oven’s dry fan. Here, the hidden tray shines. Place a heavy-duty roasting tin on the lowest rack during your hour-long preheat. When you finally load the bread, carefully pour a cup of boiling water into the tin, immediately shutting the door to trap the rolling cloud inside.
For the Busy Parent
- Dried pasta shapes cook perfectly al dente starting in cold water.
- Pork skin crackling blisters perfectly crunchy enduring this unexpected bicarbonate rub.
- Hollandaise sauce achieves thick glossy textures abandoning traditional stressful double boilers.
- Root vegetables maintain perfect crispness submerged under this simple cold water.
- Balsamic vinegar reduces into thick sweet syrups skipping this aggressive boil.
Executing the Wet Bake
Preparing your oven for steam requires a deliberate, almost choreographed approach. You are dealing with intense heat and rapidly expanding gases, so quiet focus is required. Move smoothly, ensuring your tools are staged exactly where you need them before the oven door ever opens.
Your primary goal is to flood the chamber with moisture instantly and trap it there without letting the heat escape. Do not linger, and strictly refrain from peeking once the door is shut. The first twenty minutes dictate the entire structural integrity and final volume of your loaf.
Follow these specific physical cues for a faultless execution:
- Place a heavy tray or skillet on the bottom shelf while the oven preheats to 240 Degrees Celsius.
- Boil the kettle exactly two minutes before you plan to turn out and score your dough.
- Slide your scored dough swiftly onto the baking stone or middle shelf.
- Pour 250ml of boiling water into the bottom tray, keeping your face and bare arms well back from the resulting steam cloud.
- Shut the door firmly, lowering the temperature dial to 220 Degrees Celsius to bake.
The Tactical Toolkit: 250ml of boiling water, a heavy-duty base tray (aluminium or cast iron), heavy protective oven gloves, and a fast-boiling kettle stationed nearby.
Beyond the Loaf
Mastering this delicate interaction between heat and water does more than just improve your Sunday breakfast. It strips away the frustrating mystery of kitchen failures, replacing blind hope with absolute, quiet control over your environment. You stop fighting the inherent limitations of domestic appliances and start manipulating them to your distinct advantage.
There is a profound, grounding comfort in pulling a perfectly domed, blistered loaf from the cooling rack. It validates your patience, proving definitively that the hours spent tending to your starter and folding sticky, difficult dough were not wasted. You have finally learned to read the environment, giving the bread exactly what it needs to thrive in its final moments.
When you understand that softness and moisture are the true precursors to a shattered, golden crust, your entire perspective shifts. You are no longer just following a rigid recipe; you are conducting the physical elements themselves.
Water is the invisible hand that shapes the bread; control the vapour, and the crust will look after itself.
| Key Point | Detail | Added Value for the Reader |
|---|---|---|
| Delayed Crust Formation | Steam keeps the dough surface cool and pliable for the critical first 20 minutes of baking. | Allows maximum dough expansion without surface tearing or resulting crumb density. |
| Heat Transfer Efficiency | Wet, humid air conducts oven heat significantly faster than dry air. | Creates that explosive, rapid upward lift before the yeast ultimately dies off. |
| Gelatinisation | Moisture interacts directly with surface starches to form a thin, sticky gel layer. | Produces a heavily blistered, deeply caramelised, and highly appealing shiny crust. |
Frequently Asked Questions
Will adding water warp or damage my oven?
Domestic ovens are generally built to handle moderate amounts of moisture. Avoid pouring cold water directly onto the oven floor or glass door; always use a dedicated roasting tin or cast-iron pan to hold the water securely.How much water is actually necessary for a standard loaf?
Around 250ml to 300ml of freshly boiling water is perfectly sufficient. You only need the steam to last for the first 20 minutes of the bake, after which you actively want a dry environment to crisp the crust.Can I just spray the bread with a plastic water bottle?
A few spritzes are helpful but evaporate within seconds. A hidden tray of water provides continuous, rolling steam that actively protects the dough during its entire expansion phase.When do I safely remove the water tray?
Leave it in place for the first 20 minutes. Once the dough has sprung and the crust is set, carefully remove the tray (or simply let it boil dry) so the remaining baking time focuses entirely on crisping the exterior.Does this technique work for non-sourdough breads?
Absolutely. Any yeast-leavened bread that benefits from a crisp crust and a light, airy crumb will react beautifully to a highly humid baking environment.