Picture a sleepy Sunday morning. You have weighed out the self-raising flour, dusted the worktop, and cubed a block of fridge-cold butter. You start rubbing it in with your fingertips, aiming for that ‘fine breadcrumb’ texture your grandmother insisted upon. But within minutes, the friction betrays you. The butter softens into a greasy paste. The flour turns yellow and heavy, clinging to your fingers in damp clumps. The air carries the scent of overworked dough, and you already know, deep down, that these scones will emerge from the oven resembling flat, dense stones rather than towering, airy clouds.
It is a frustration known to nearly every home baker in the United Kingdom. We are taught that rubbing butter into flour is the fundamental rhythm of baking. Yet, this traditional method contains a fatal, physiological flaw: human hands are essentially walking radiators. By the time you have achieved those coveted breadcrumbs, your body heat has already melted the fat. You have lost the battle for flake before the baking tray has even seen the inside of the oven.
The Architecture of Cold
To understand the perfect scone, we must understand the mechanics of lamination. It is a dialogue of temperatures. When tiny, distinct pieces of solid, cold butter are suspended within the flour matrix, they wait patiently for the extreme heat of the oven. Once there, the water content inside the butter evaporates into steam, pushing the layers of dough upwards. This creates the hollow, flaky pockets that allow a scone to split open beautifully, ready for clotted cream and jam.
If the butter is smeared and melted into the flour by warm hands, there are no distinct pockets. The steam cannot gather. The dough simply bakes into a solid mass. You do not need to rub the butter. You need to protect its structural integrity.
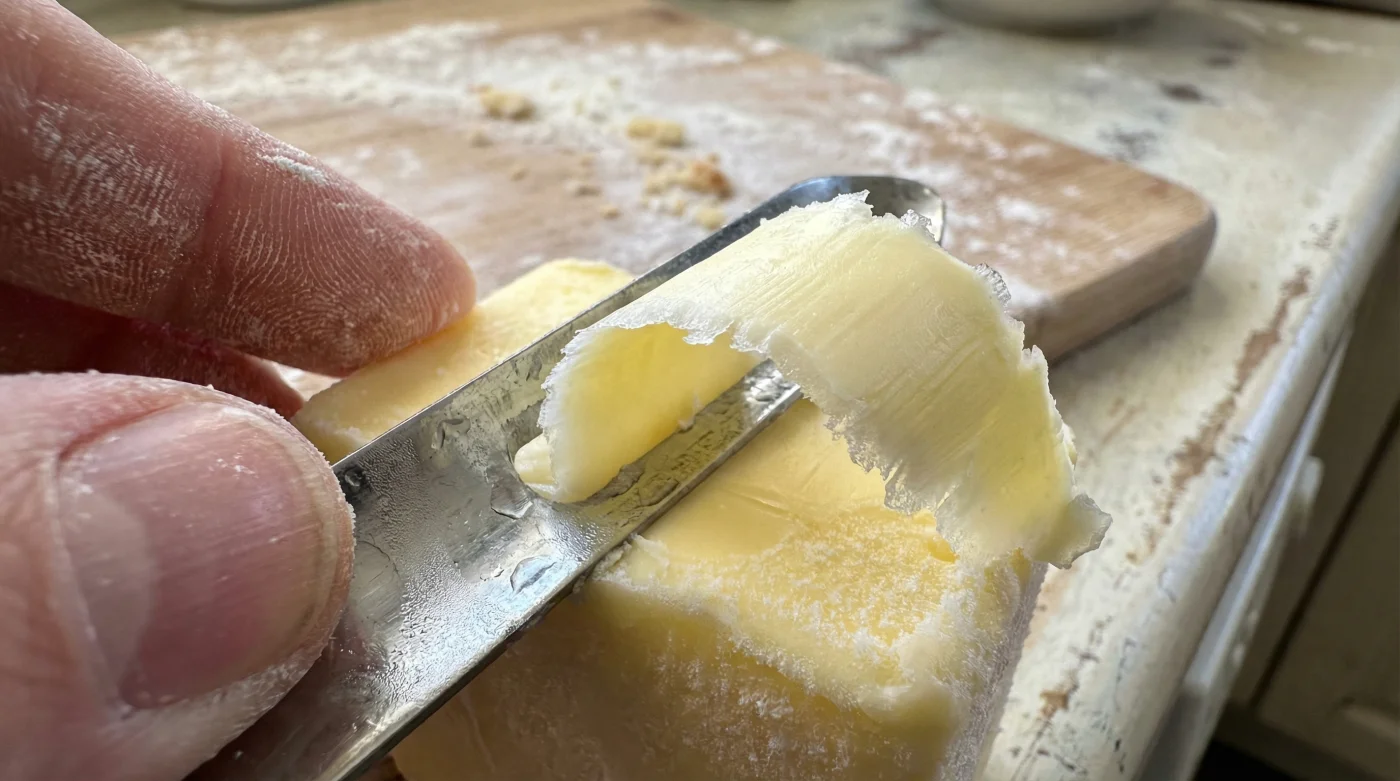
I learned this during a damp November afternoon in a small bakery in Somerset. Thomas, a master baker with flour permanently dusted across his apron, watched me struggle with a batch of pastry. Smiling, he walked over and handed me a thoroughly ordinary, two-pound-sterling vegetable peeler. ‘Baking is mostly just managing the architecture of cold,’ he told me. ‘Stop touching the butter. Shave it.’
| The Home Baker | The Strategic Benefit of Peeling Butter |
|---|---|
| The Anxious Novice | Removes the guesswork of ‘breadcrumb texture’ entirely, ensuring immediate success and high-rising bakes. |
| The Rushed Parent | Reduces preparation time significantly; peeling takes seconds compared to minutes of tedious rubbing-in. |
| The Sunday Perfectionist | Achieves professional-grade lamination and distinct layers without the complex folding techniques used in puff pastry. |
By freezing a block of butter and shaving it with a standard peeler, you bypass the warm hands entirely. The peeler creates impossibly thin, wide ribbons of fat. These ribbons possess an immense surface area, meaning they coat the flour beautifully, but they remain utterly frozen. It is a simple kitchen hack that corrects centuries of flawed, warm-handed technique.
| Thermal Factor | Scientific Measurement | Baking Impact |
|---|---|---|
| Human Fingertips | Approx. 32°C | Directly transfers heat, melting butter fats prematurely during the rubbing stage. |
| Butter Melting Point | 30°C to 35°C | Turns from a structural solid into a heavy liquid, creating claggy, dense dough. |
| Frozen Shaved Butter | -10°C to -15°C | Retains sharp edges. Requires maximum oven heat to melt, ensuring explosive steam release. |
| Oven Spring Dynamics | 220°C Ambient Heat | Instantly vaporises the water trapped in the frozen butter ribbons, lifting the dough vertically. |
The Shave and the Shiver: Practical Application
To execute this properly, you must be intentional with your prep. First, abandon the fridge. Place your block of butter into the freezer for at least forty-five minutes. It needs to be rock solid. A soft block will merely clog the blade of your peeler and frustrate you.
Weigh out your flour, baking powder, and a small pinch of salt into a large, cold mixing bowl. If your kitchen is particularly warm, you can even chill the bowl beforehand. Take your vegetable peeler. A sturdy Y-shaped peeler works best here, as it allows you to drag the blade smoothly down the length of the butter block.
- Tesco smoked salmon triggers urgent nationwide recalls over sudden listeria contamination.
- Dijon mustard faces severe British supermarket shortages following disastrous French harvests.
- Pork shoulder stays stubbornly tough missing this aggressive apple juice marinade.
- Basmati rice clumps unpleasantly ignoring this controversial warm water rinsing method.
- Sliced bread restores rock-hard brown sugar blocks completely overnight inside containers.
Once all the required butter is shaved, do not plunge your hands into the bowl. Take a flat palette knife or a simple dinner knife and gently toss the ribbons in the flour until every piece of butter is individually coated. Add your milk, stir swiftly with the knife until it just comes together, and tip it onto the worktop to cut your shapes.
| Component | What to Look For | What to Avoid |
|---|---|---|
| The Tool | A sharp, wide-mouthed Y-peeler made of stainless steel. | Dull, pivoting swivel peelers that drag rather than slice. |
| The Butter State | Completely frozen, offering hard resistance to the blade. | Fridge-cold butter, which will bend and smear under pressure. |
| The Mixing Motion | Lightly tossing with a metal palette knife. | Squeezing, pressing, or using bare hands to combine the mixture. |
The Wider Rhythm of the Kitchen
When you change how you handle your ingredients, baking stops feeling like a frantic race against the clock. By trusting the freezer and relying on the sharp edge of a peeler, you remove the physical stress of manual labour. You are no longer fighting the butter; you are preserving its potential.
There is a profound satisfaction in sliding a tray of scones into a hot oven and watching them rise like cathedral spires. They will split naturally around the middle, revealing a flaky, almost croissant-like interior that shatters beautifully when you bite into it. It reminds us that sometimes, the best way to improve our cooking is not by working harder, but by stepping back, cooling down, and letting the mechanics of the ingredients do the heavy lifting.
The oven only builds upon the foundation of cold you lay on the worktop; respect the temperature, and the dough will respect you. — Thomas, Master Baker
Frequent Baking Inquiries
Can I freeze the butter overnight?
Yes. Leaving the butter in the freezer overnight is perfectly fine, though you may need to let it rest at room temperature for two minutes before peeling so the blade can bite into it without slipping.Does this work for other pastries?
Absolutely. This method is phenomenal for rough puff pastry, pie crusts, and crumbles. Anywhere a recipe demands ‘rubbing in’, the peeler method will yield a flakier result.Should I use salted or unsalted butter?
For scones, unsalted butter is generally preferred so you can control the sodium levels, but salted butter works wonderfully if you omit the pinch of salt in the dry ingredients.What if my peeler keeps getting stuck?
Your blade is likely dull, or the butter is not frozen enough. Try a firmer grip, a sharper peeler, or give the butter another twenty minutes in the freezer.How long do these scones keep?
Like all scones, they are best eaten within hours of baking. However, because of the distinct butter layers, they freeze beautifully once baked and cooled, reviving perfectly in a warm oven.